Viewing one tracker (option "Link for tracking")
A tracking link is the provision of temporary or permanent access to view the movement of your tracker.
The link can be given to any person, even unregistered on the website of the monitoring platform http://livegpstracks.com. You can post it on your blog or social media accounts.
Due to the complex mechanism of link generation, it is impossible to guess or pick it up by brute force. Therefore, you can be sure that outsiders will not be able to access the movement of your tracker. You can set a password for the entrance and then access will be only for people to whom you personally tell the password.
Links can be unlimited or limited in time. Unlimited links give the right to view the movement and tracks as long as the tracker is connected to the account.
Time-limited links give the right to watch the movement and tracks only for a given period of time. Before the beginning and after the end of the link, it is not possible to view the tracks and move.
Links can be created both on the website http://livegpstracks.com in tracker management, in the Mobile Dispatcher application or in the RealTimeTracker application.
The number of links created for each connected tracker is not limited.
How to create links on the website
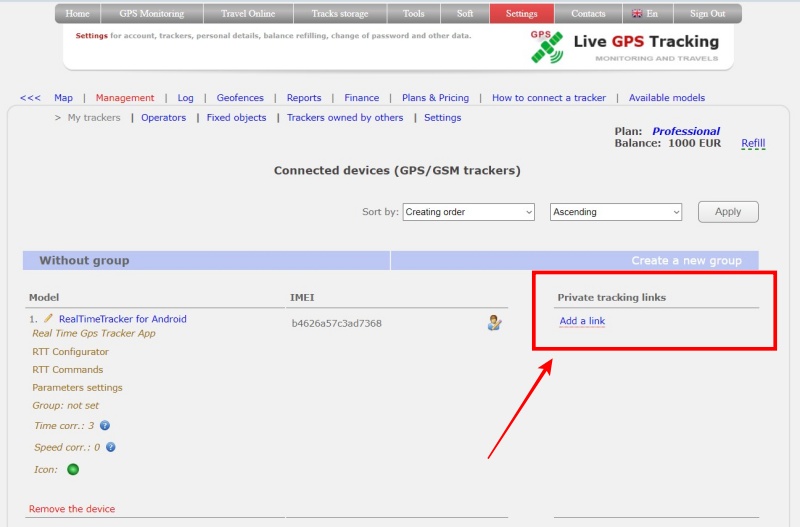
➔ Go to tracker management (Top menu - Settings - tab “GPS Monitoring”)
➔ In the list of connected devices on the right there is an area “Private tracking links”.
➔ Inside the area there is an inscription “Add a link”. Click on it.
➔ To create an unlimited link, simply click “Add” button.
➔ Or fill in the fields:
- Description of the link - give the link a title or a short description.
- Password - fill in this field if you want to limit the circle of people who have access to the link.
- Date and time of the display period - Fill in the fields with dates and times to restrict access to the movement view to selected dates only. if you leave the fields blank, the link will be indefinite.
- Disable the track review - set the setting if you want to give access only to online movement without viewing the history (track)
- Enable chat - turn on chat function for livegpstracks.com users
- Enable chat for guests - turn on chat function for all (unregistred and registred users)
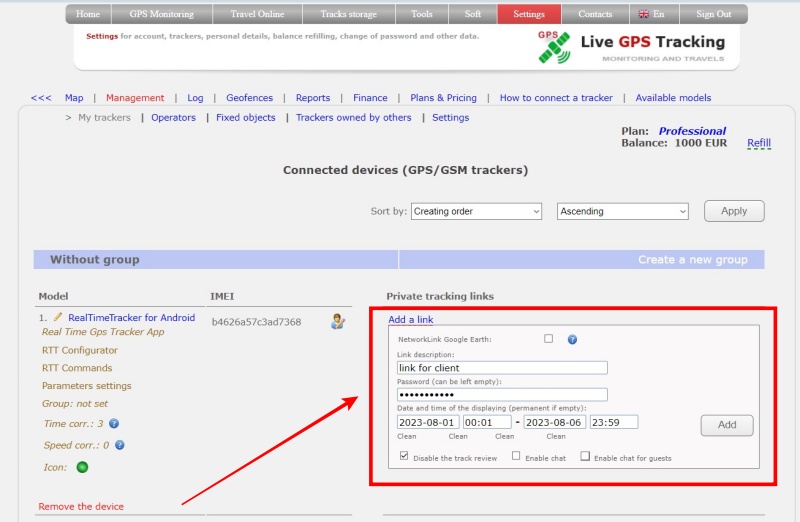
➔ Click the “Add” button
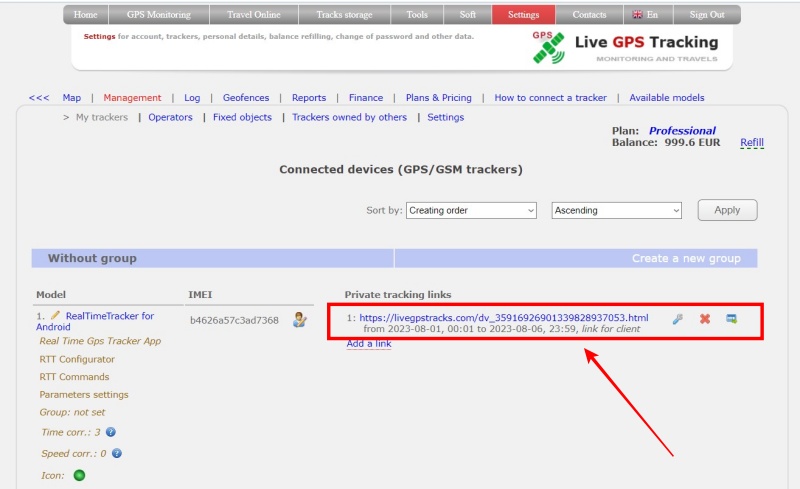
The link should appear in the field. That is what you can give to other people.
To create a new link, click again on “Add Link”
Other ways to create a link
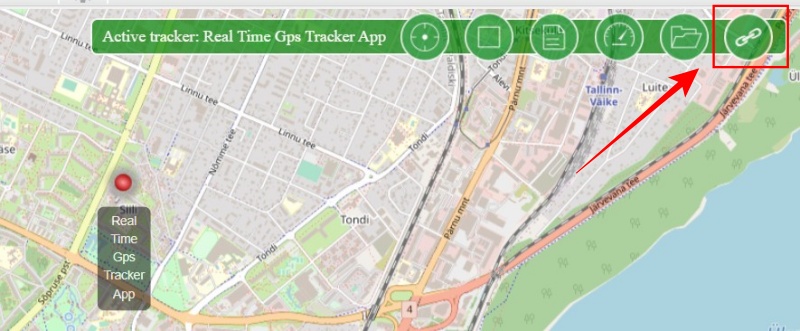
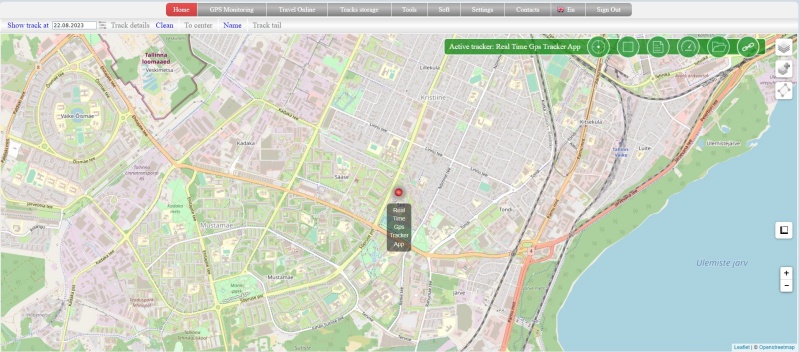
You can also create a link while viewing the movement on the map.
➔ To do this, select the desired tracker and click on the last button in the green panel.
➔ Fill in the fields as described above
➔ Click the “Create” button
What will a person see by clicking on the link
As you can see from the screenshot, the tracking link is practically no different from the view for a registered user.
How to edit tracking link
To the right of each created link, there are several buttons.
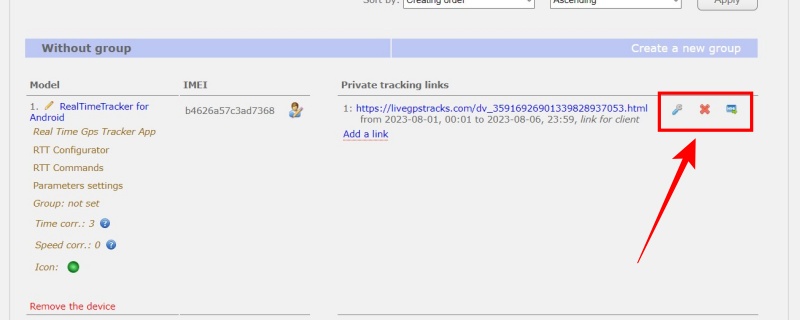
To edit the link, click on the “wrench” button. Edit the field values and save the changes.
How to delete tracking link
To the right of each created link, there are several buttons.
To delete a link, click on the “cross” button.
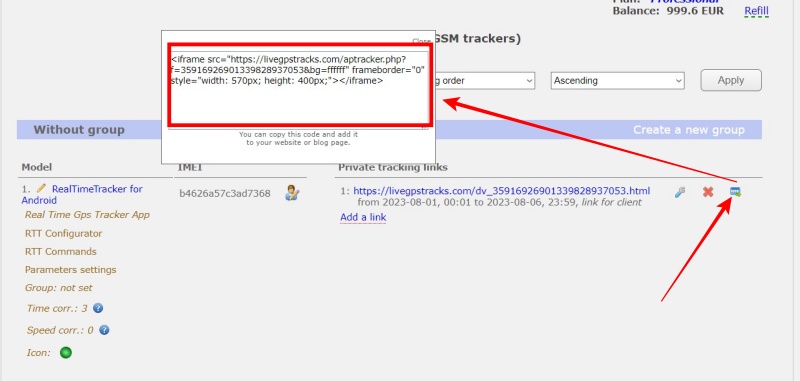
How to embed a tracking link in your blog or website?
To the right of each created link, there are several buttons.
➔ Click on the far right button labeled “html”.
➔ In the window that appears, select copy the text to paste.
➔ Embed a link to a page on your website or blog.