How to view the movement track (history)?
➔ Each page of the Website has a top menu.
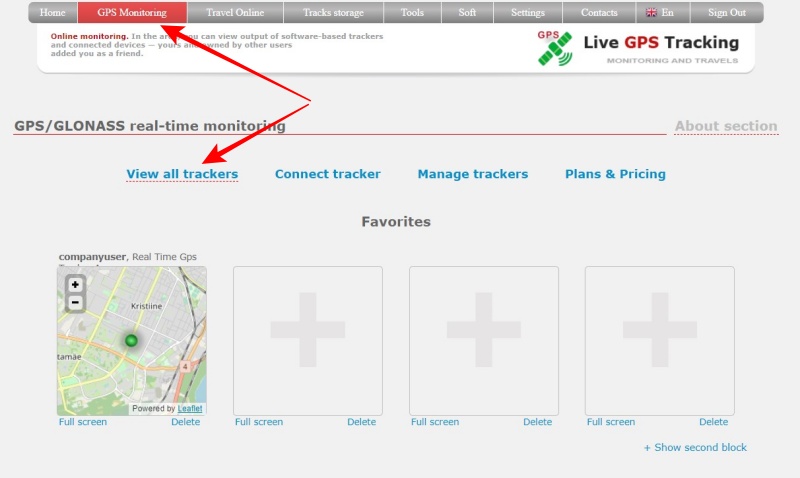
➔ The first item is “GPS Monitoring”. Click on it.
➔ You will goto to the information page (dashboard) of the monitoring section.
➔ Click on “View all trackers” link to go to the map.
If you turned off information page (dashboard), just click on “GPS Monitoring” and you will on the map page.
Above the map is an additional menu. It contains the following items:
Show track for | date selection | filtering/track settings (icon) | Track Details | Clear
All items are a set of tools for working with tracks.
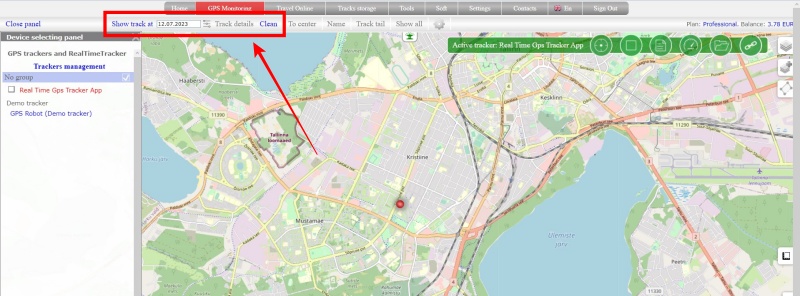
Show track for - when you click on the text, it displays the track for the date set in the next “date selection” field. For example, in the screenshot above, when you click on the text, the track for 12/07/2023 will be displayed
Date selection - when you click on the field, it opens the settings window for building the track. Including the settings window contains a calendar for selecting dates. When working with a calendar, this field is set to the date or dates for which the track was built
filtering/track settings (icon) - when you click on the icon, it opens the settings window for building a track. If parameters for track filtering were selected in the settings, then this icon will change its appearance. It can always be used to determine how the track was built - with additional. filters or not.
Track Detailes - displays the track in a detailed view, where you can see information for each point. The item becomes available only after the track is built.
Clear - clears the map from the displayed track
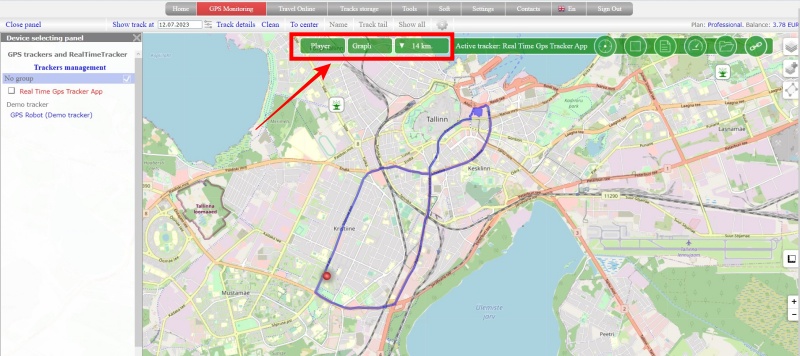
For example, track is blue line on the screenshot bellow.
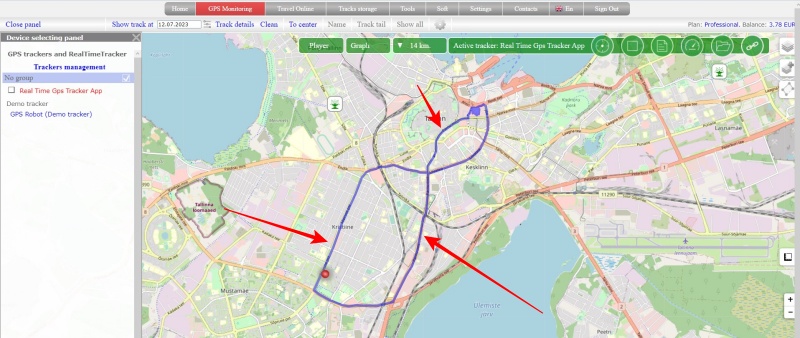
After loading the track, a number of panels related to the constructed track will appear on the map:
Player - clicking on the panel opens the track player
Graph - clicking on the panel opens a window for working with graphs
Track information - clicking on the panel opens the information window for the displayed track