
Monitoring objects through the Google Earth program
Create the tracking link ot the livegpstracks.com
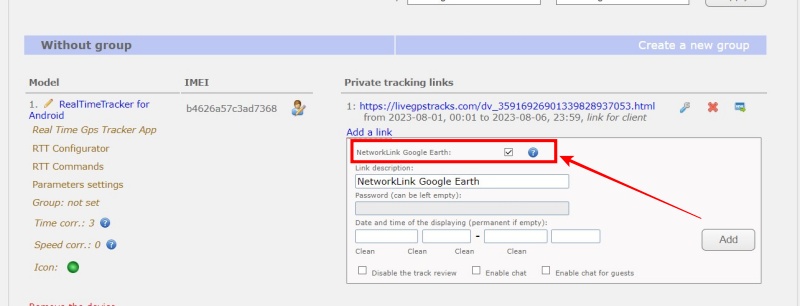
➔ Create a tracking link. How links are created is described here
➔ In the link creation window, activate “NetworkLink for Google Earth“
➔ Optionally fill in the name of the link. The name will not be transferred to Google Earth, but only serves as a reminder in the settings.
➔ If you want to limit the viewing period, fill in the date fields. The movement of the tracker on the created link will be displayed only during the specified period.
➔ Click the “Add” button
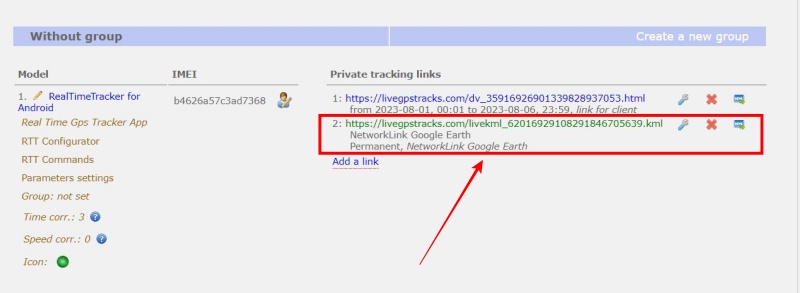
The link should appear in the list.
By default, it is assumed that the link is used to track a single tracker, so the “Fly to View” option is enabled and the camera follows the object as it moves.
If several links are added to Google Earth, then this behavior becomes inconvenient - the camera starts constantly “jumping” from one object to another. Due to a bug in the “Google Earth” program itself, setting this parameter in the link settings does not work. Therefore, it can be set in the link itself.
The parameter is called flytoview. To disable camera movement, it must be equal to zero - “flytoview=0”.
An example of adding a parameter: http://livegpstracks.com/livekml_0000000000000000000000.kml?flytoview=0
How to insert a link in Google Earth
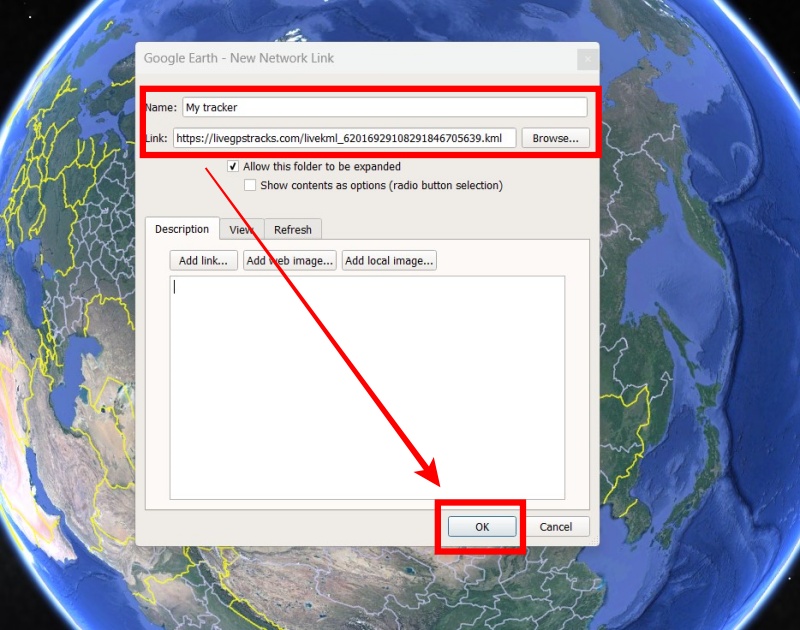
➔ Copy the address of the link created in the previous step to your clipboard
➔ Open Google Earth
➔ Menu “Add” → Item “Network Link“
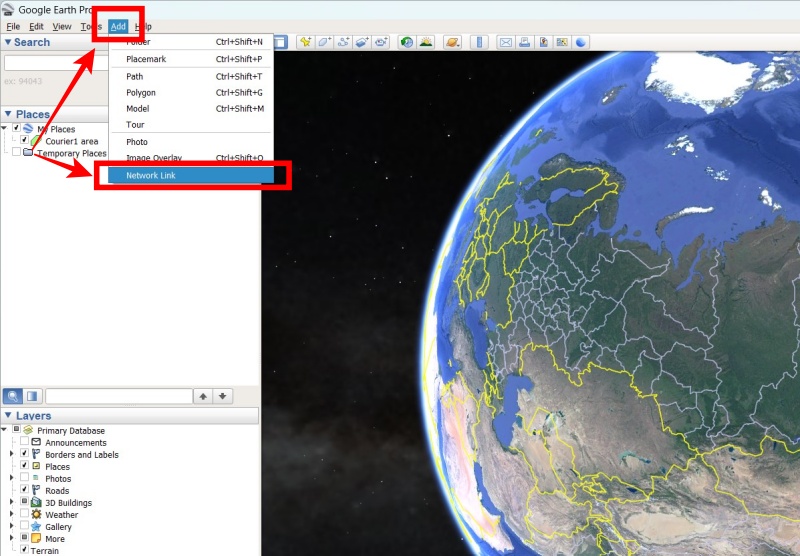
➔ In the dialog that appears, paste the link address from the clipboard into the “Link” field
➔ Optionally, enter text in the “Name” field
➔ Click “OK” button
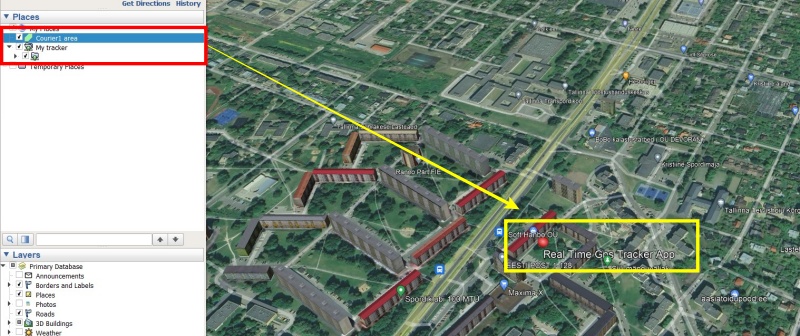
The added link should be displayed in the left field of the program.
Select element and the tracker will appear on the map.
Now you can watch the movement of the tracker online in Google Earth.
The option is available on the tariffs: “Simple”, “Professional”