
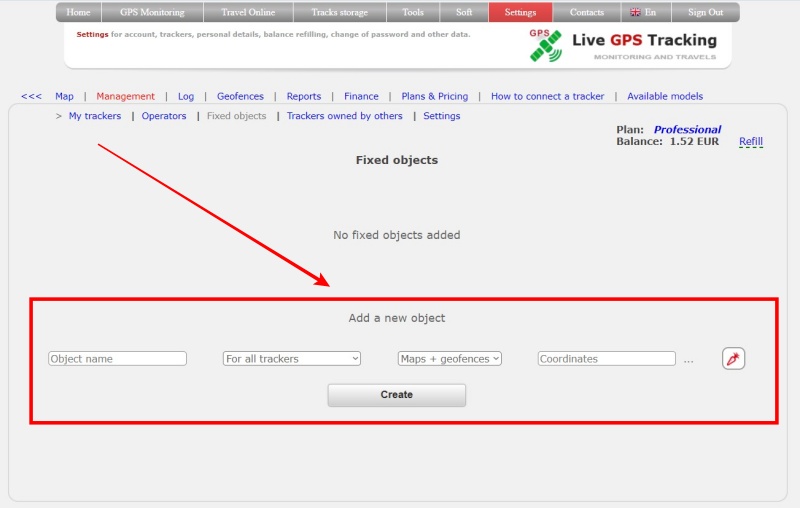
Fixed objects
What is "fixed objects"
Fixed objects are special points or marks installed on the map.
With the help of such objects, it is possible to mark important places, for example, which the tracked trackers should visit, as well as using proximity zones to find out at what time the tracker was near the marked place or approached at the moment.
Fixed objects settings


How to create objects?
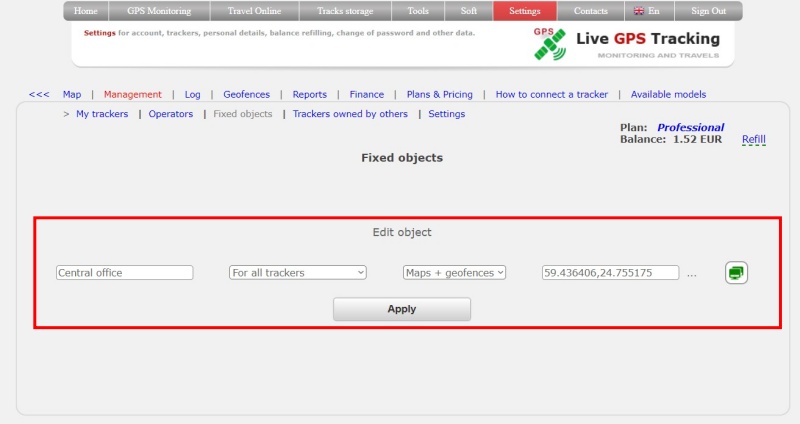
In the “Add new object” block, fill in the fields:
➔ Object name - enter any name
➔ For all trackers - an object can be created both for all trackers and for a specific one. If an object is linked to a specific tracker, then it will be displayed on the map only if the linked tracker is active.
➔ Object type:
- Maps+geofences - the object will be displayed on the map. It will be possible to create proximity zones on it
- Only on the map - the object will be displayed on the map. It will not be possible to create proximity zones on it
- Only for geofences - the object will not be displayed on the map. It will be possible to create proximity zones on it
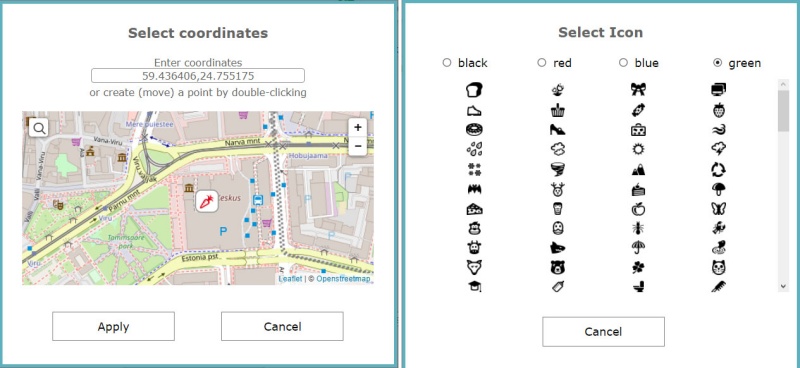
➔ Coordinates - click on the input field, or on the “…” button located to the right of the field. In the window that appears, mark a point on the map.
➔ Object icon - click on the button with the picture. In the window that opens, select an image and its color.
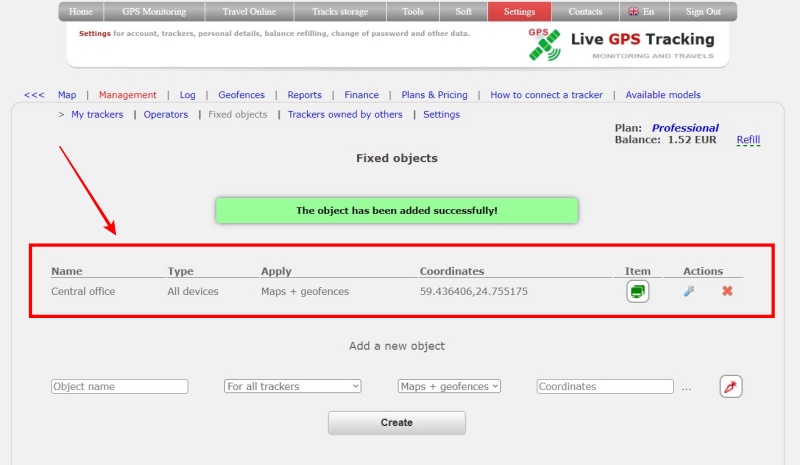
➔ After filling in all the fields, click the “Create” button
How to edit an object?
➔ In the object line, click on the “wrench” icon.
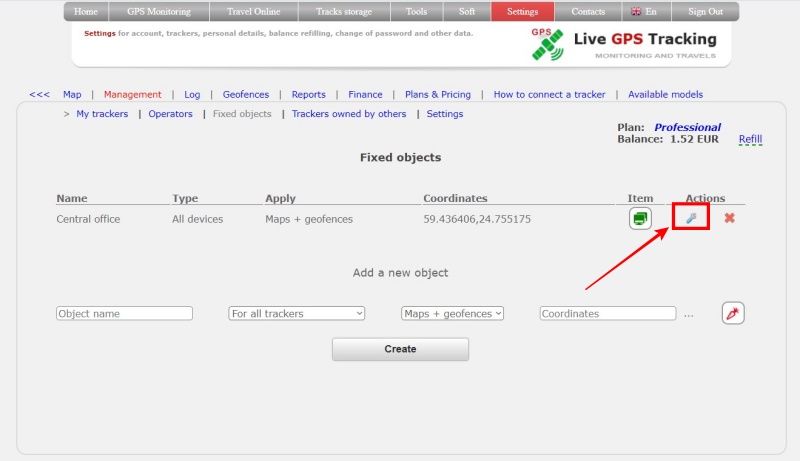
➔ Edit the required fields and click the “Apply” button
How to delete an object?
➔ In the object line, click on the “cross” icon.
➔ Confirm the deletion and the object will be deleted.
Displaying fixed objects on the map
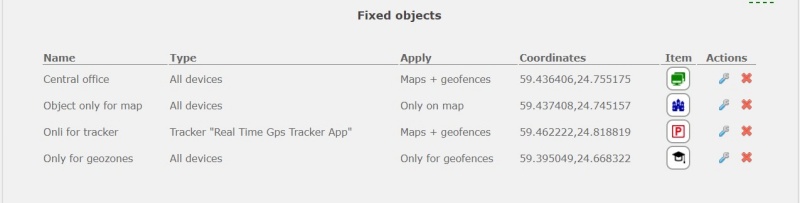
For example, let's create 4 objects of different types and applications.
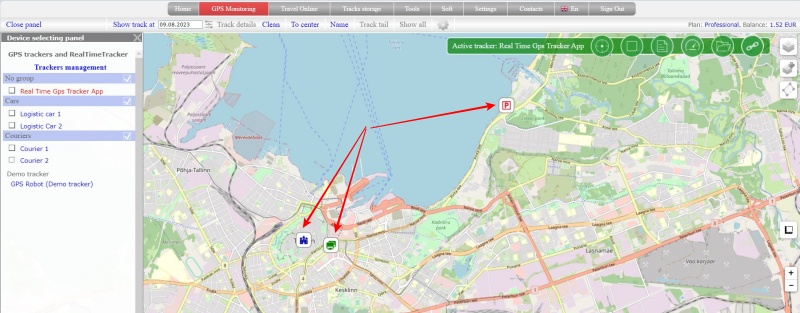
Let's go to the map.
Only 3 objects are displayed on the map. This happened because one of the features was set to “Only for geofences”. At the moment, the “Real Time Gps Tracker App” device is selected as active. On the map you can see the object with the icon “P” (object only for this tracker). If you switch to any other device list object, the “P” object will no longer be displayed.
The other two objects are available to all trackers and will always be displayed on the map.
Click on the object and a window with the name will be displayed.
How to set the approach zone on the created object?
The process of creating a approach zone for a stationary object is no different from creating zones for trackers.
It should be noted that stationary objects can only be used as central objects.
The list displays only objects with types “Maps+geofences” and “Only for geofences”.
What are approach zones and how to work with them can be found in this article.